OpenCV 이미지 처리 2
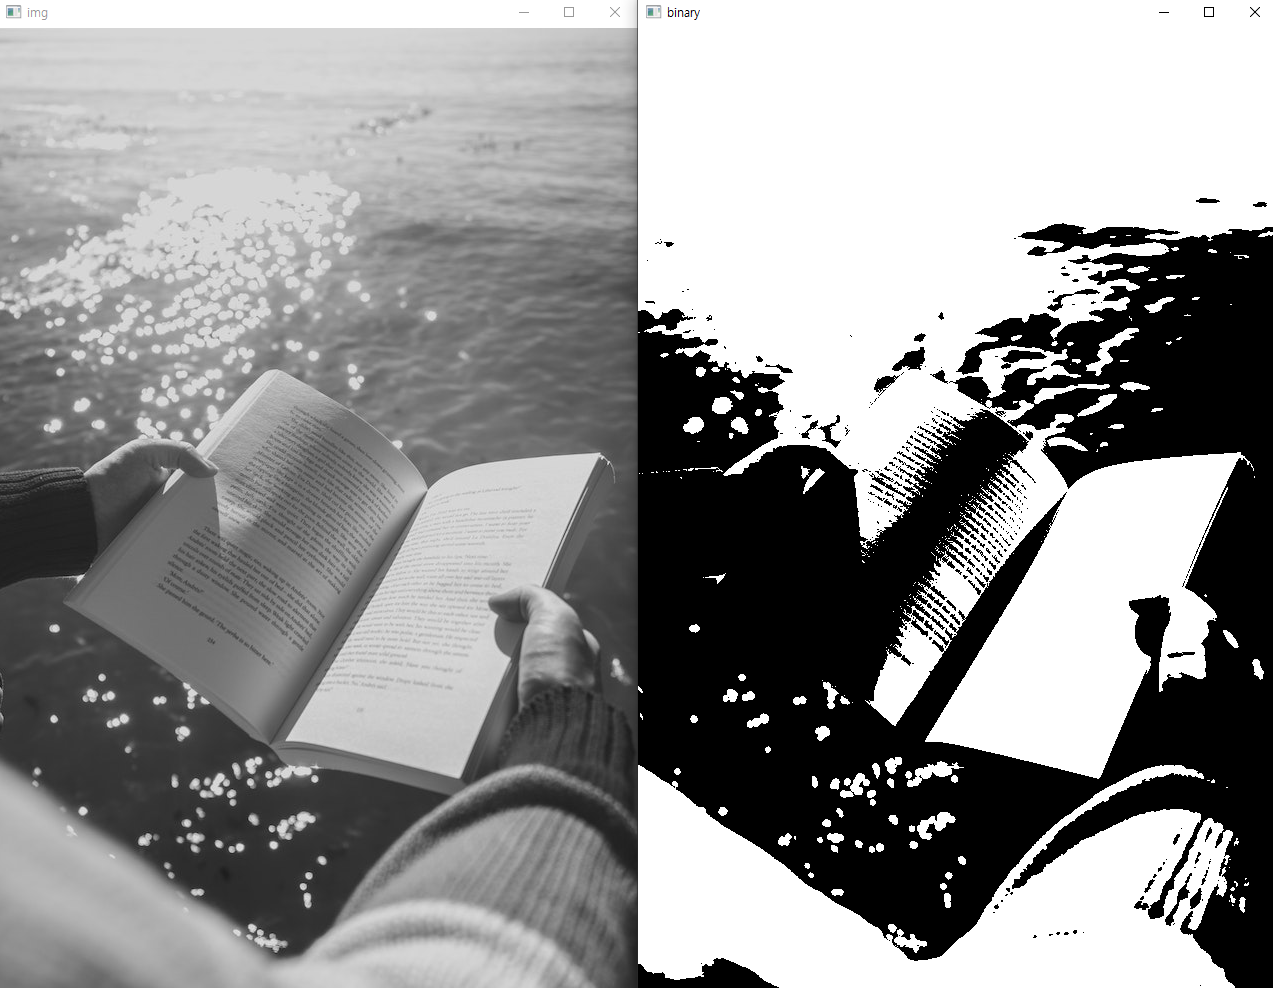
13. 이미지 변형 (이진화)
Threshold
In [1]:
import cv2
img = cv2.imread('book.jpg', cv2.IMREAD_GRAYSCALE)

ret, binary = cv2.threshold(img, 127, 255, cv2.THRESH_BINARY)
# 127(임곗값) 기준 넘으면 255로 표현

cv2.imshow('img', img)
cv2.imshow('binary', binary)
cv2.waitKey(0)
cv2.destroyAllWindows()
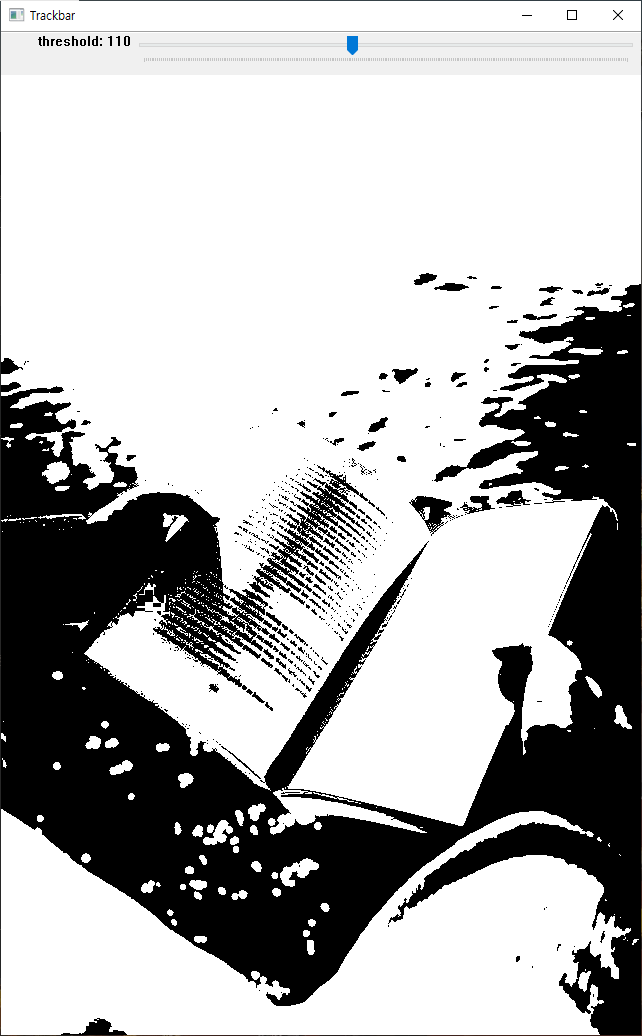
Trackbar (값 변화에 따른 변형 확인)
In [2]:
import cv2
img = cv2.imread('book.jpg', cv2.IMREAD_GRAYSCALE)

def empty(pos):
    # print(pos)
    pass

name = 'Trackbar'
cv2.namedWindow(name)

cv2.createTrackbar('threshold', name, 127, 255, empty) # bar이름, 창이름, 초기값, 최대값, 이벤트 처리

while True:
    thresh = cv2.getTrackbarPos('threshold', name) # bar이름, 창이름
    ret, binary = cv2.threshold(img, thresh, 255, cv2.THRESH_BINARY)

    if not ret:
        break
    cv2.imshow(name, binary)
    if cv2.waitKey(1) == ord('q'):
        break

cv2.destroyAllWindows()
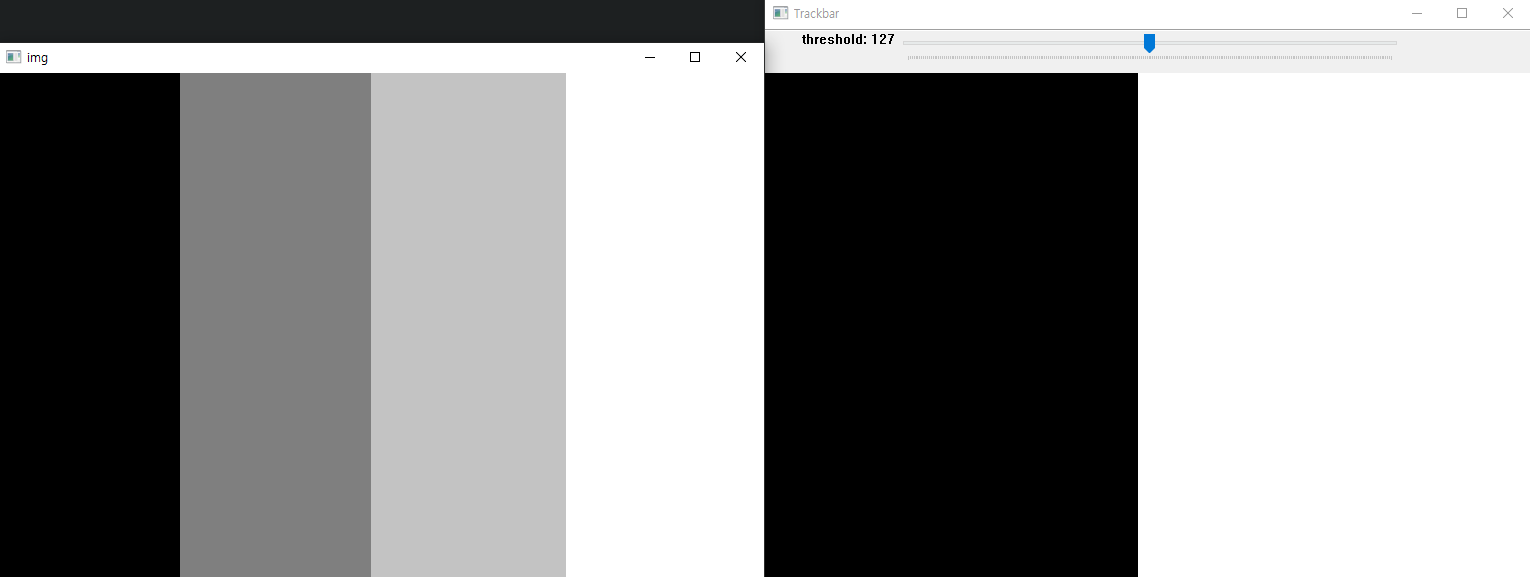
그림판 제작 이미지 테스트
In [3]:
import cv2
img = cv2.imread('threshold.png', cv2.IMREAD_GRAYSCALE)

def empty(pos):
    # print(pos)
    pass

name = 'Trackbar'
cv2.namedWindow(name)

cv2.createTrackbar('threshold', name, 127, 255, empty) # bar이름, 창이름, 초기값, 최대값, 이벤트 처리

while True:
    thresh = cv2.getTrackbarPos('threshold', name) # bar이름, 창이름
    ret, binary = cv2.threshold(img, thresh, 255, cv2.THRESH_BINARY)

    if not ret:
        break

    cv2.imshow('img', img)
    cv2.imshow(name, binary)
    if cv2.waitKey(1) == ord('q'):
        break

cv2.destroyAllWindows()
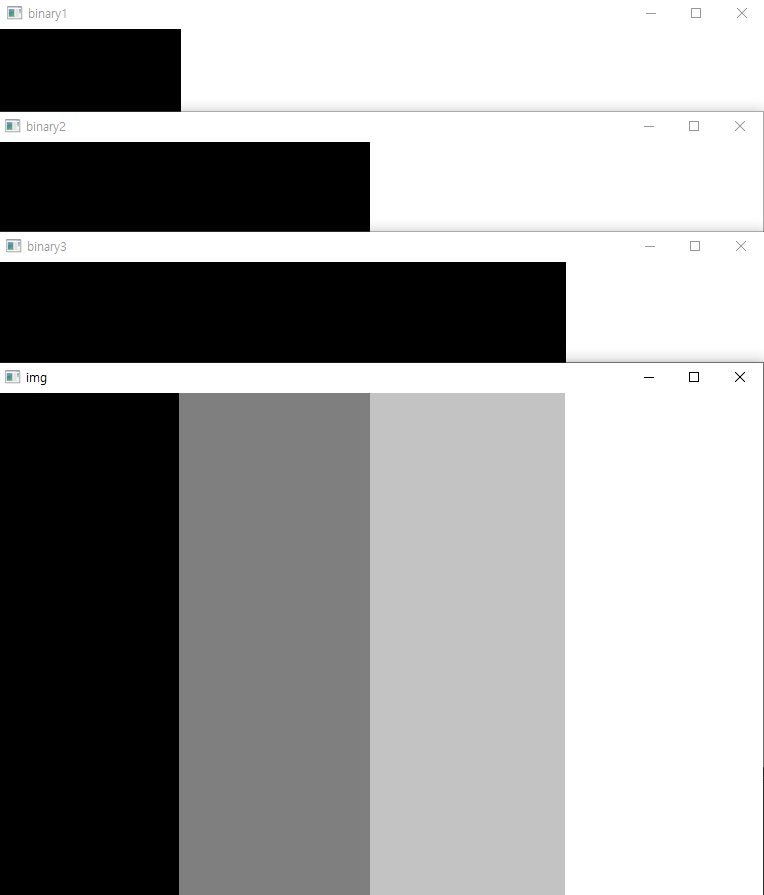
In [4]:
import cv2
img = cv2.imread('threshold.png', cv2.IMREAD_GRAYSCALE)

ret, binary1 = cv2.threshold(img, 0, 255, cv2.THRESH_BINARY) # 진한회색, 밝은회색, 흰색
ret, binary2 = cv2.threshold(img, 127, 255, cv2.THRESH_BINARY) # 밝은회색, 흰색
ret, binary3 = cv2.threshold(img, 195, 255, cv2.THRESH_BINARY) # 흰색

cv2.imshow('img', img)
cv2.imshow('binary1', binary1)
cv2.imshow('binary2', binary2)
cv2.imshow('binary3', binary3)
cv2.waitKey(0)
cv2.destroyAllWindows()
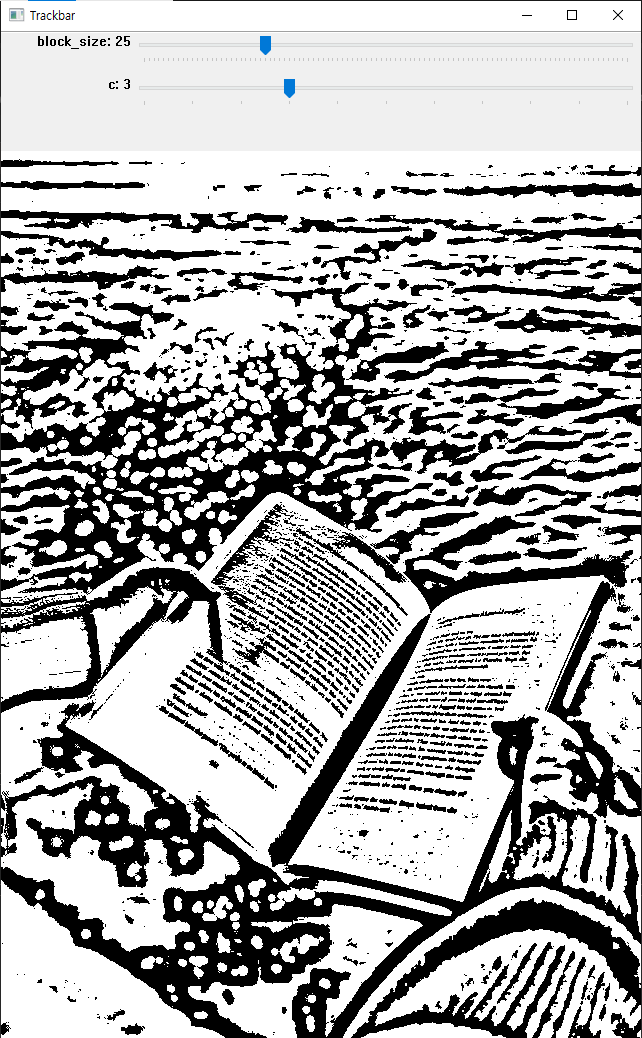
Adaptive Threshold
이미지를 작은 영역으로 나누어서 임계치 적용
In [5]:
import cv2
img = cv2.imread('book.jpg', cv2.IMREAD_GRAYSCALE)

def empty(pos):
    # print(pos)
    pass

name = 'Trackbar'
cv2.namedWindow(name)

cv2.createTrackbar('block_size', name, 25, 100, empty) # 홀수만 가능, 1보다는 큰 값
cv2.createTrackbar('c', name, 3, 10, empty) # 일반적으로 양수의 값을 사용

while True:
    block_size = cv2.getTrackbarPos('block_size', name)
    c = cv2.getTrackbarPos('c', name)

    if block_size <= 1: # 1이하면 3으로
        block_size = 3

    if block_size % 2 == 0: # 짝수면 홀수로
        block_size += 1

    binary = cv2.adaptiveThreshold(img, 255, cv2.ADAPTIVE_THRESH_MEAN_C, cv2.THRESH_BINARY, block_size, c)

    cv2.imshow(name, binary)
    if cv2.waitKey(1) == ord('q'):
        break

cv2.destroyAllWindows()
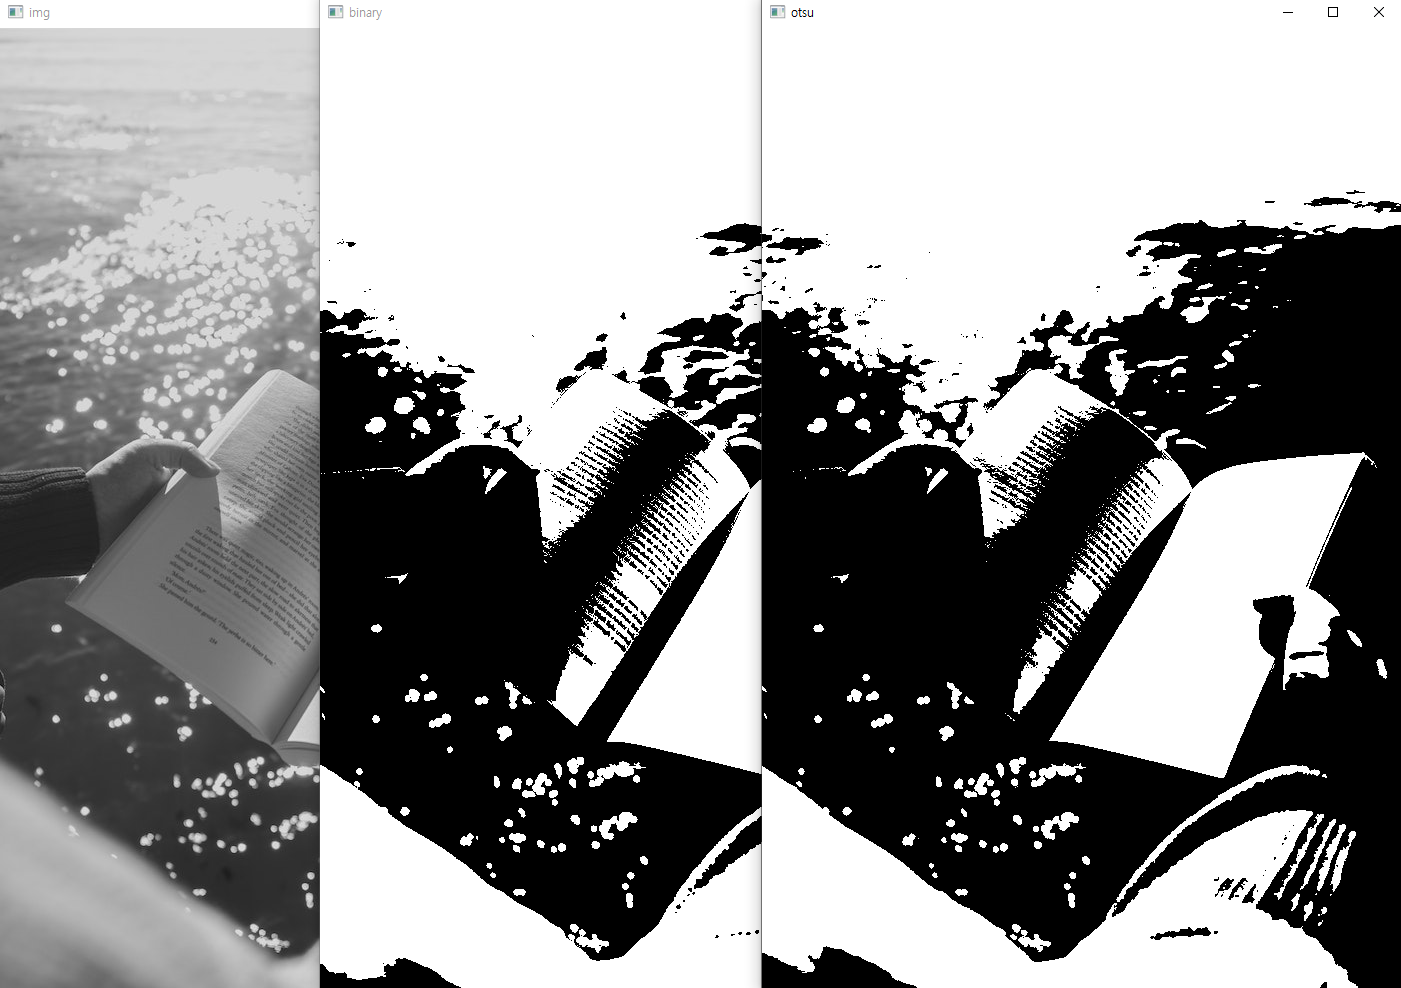
오츠 알고리즘
Bimodal Image에 사용하기 적합, 최적의 임계치를 자동으로 발견
In [6]:
import cv2
img = cv2.imread('book.jpg', cv2.IMREAD_GRAYSCALE)

ret, binary = cv2.threshold(img, 127, 255, cv2.THRESH_BINARY)
ret, otsu = cv2.threshold(img, -1, 255, cv2.THRESH_BINARY | cv2.THRESH_OTSU)
print('otsu threshold', ret)

cv2.imshow('img', img)
cv2.imshow('binary', binary)
cv2.imshow('otsu', otsu)
cv2.waitKey(0)
cv2.destroyAllWindows()
Out [6]:
otsu threshold 138.0
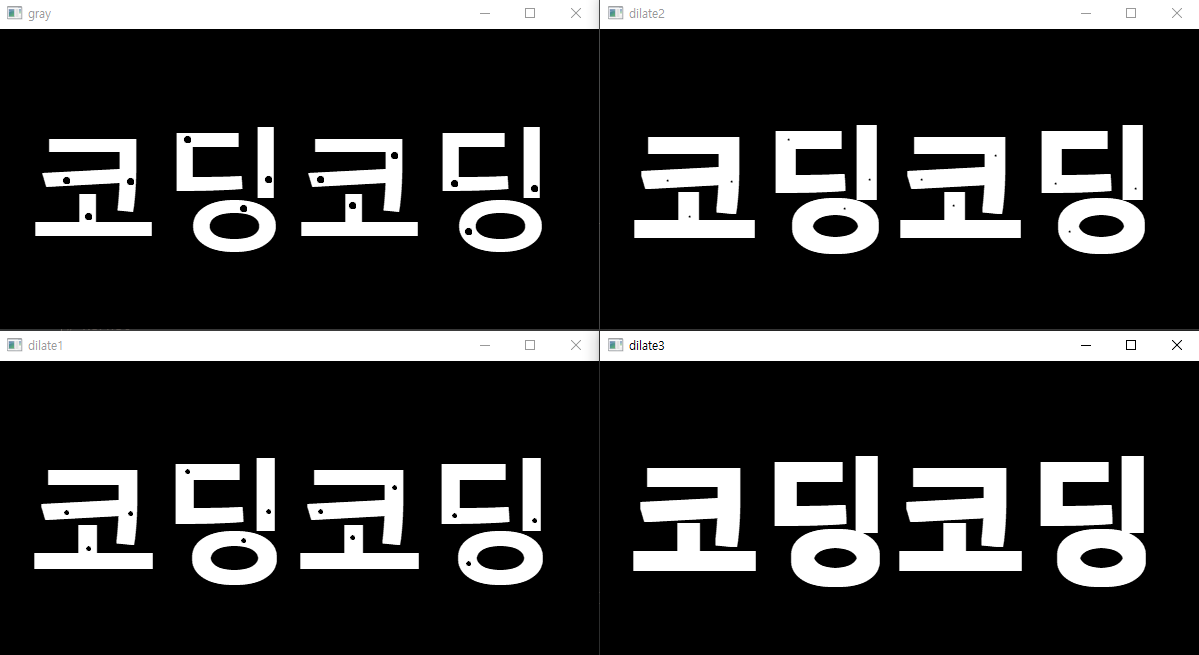
14. 이미지 변환 (팽창)
이미지를 확장하여 작은 구멍을 채움
흰색 영역의 외곽 픽셀 주변에 흰색을 추가
In [7]:
import cv2
import numpy as np

kernel = np.ones((3, 3), dtype=np.uint8)
# kernel

img = cv2.imread('dilate.png', cv2.IMREAD_GRAYSCALE)
dilate1 = cv2.dilate(img, kernel, iterations=1) # 반복횟수
dilate2 = cv2.dilate(img, kernel, iterations=2) # 반복횟수
dilate3 = cv2.dilate(img, kernel, iterations=3) # 반복횟수

cv2.imshow('gray', img)
cv2.imshow('dilate1', dilate1)
cv2.imshow('dilate2', dilate2)
cv2.imshow('dilate3', dilate3)
cv2.waitKey(0)
cv2.destroyAllWindows()
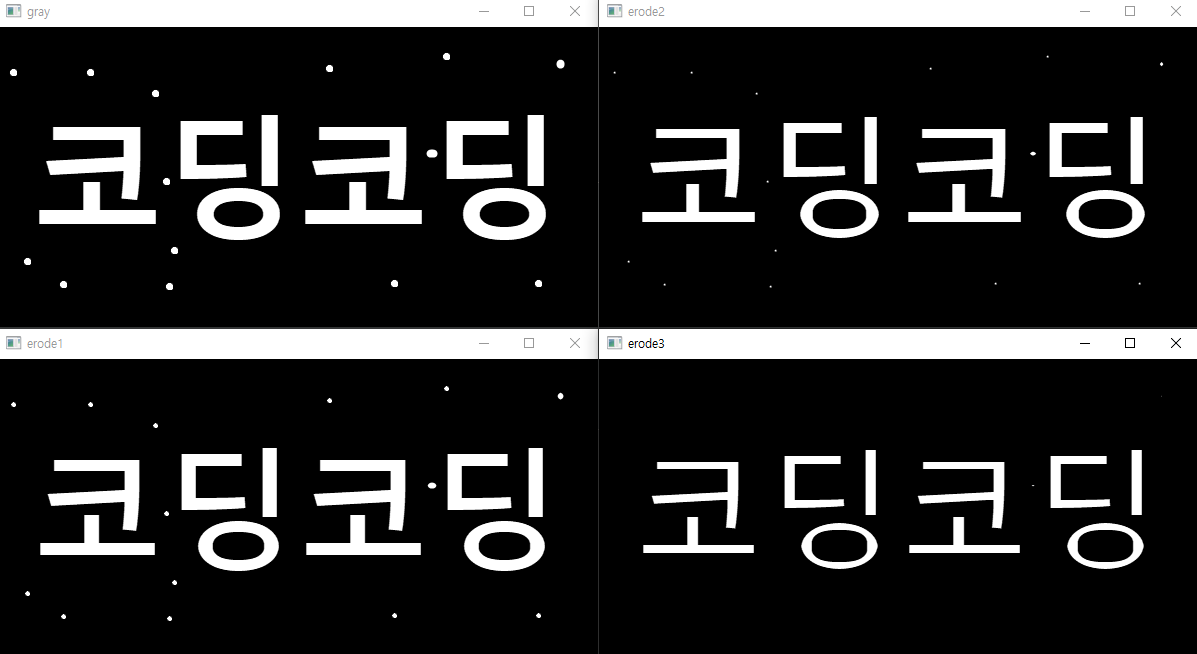
15. 이미지 변환 (침식)
이미지를 깎아서 노이즈 제거
흰색 영역의 외곽 픽셀을 검은색으로 변경
In [8]:
import cv2
import numpy as np
kernel = np.ones((3, 3), dtype=np.uint8)

img = cv2.imread('erode.png', cv2.IMREAD_GRAYSCALE)
erode1 = cv2.erode(img, kernel, iterations=1) # 1회 반복
erode2 = cv2.erode(img, kernel, iterations=2)
erode3 = cv2.erode(img, kernel, iterations=3)

cv2.imshow('gray', img)
cv2.imshow('erode1', erode1)
cv2.imshow('erode2', erode2)
cv2.imshow('erode3', erode3)
cv2.waitKey(0)
cv2.destroyAllWindows()
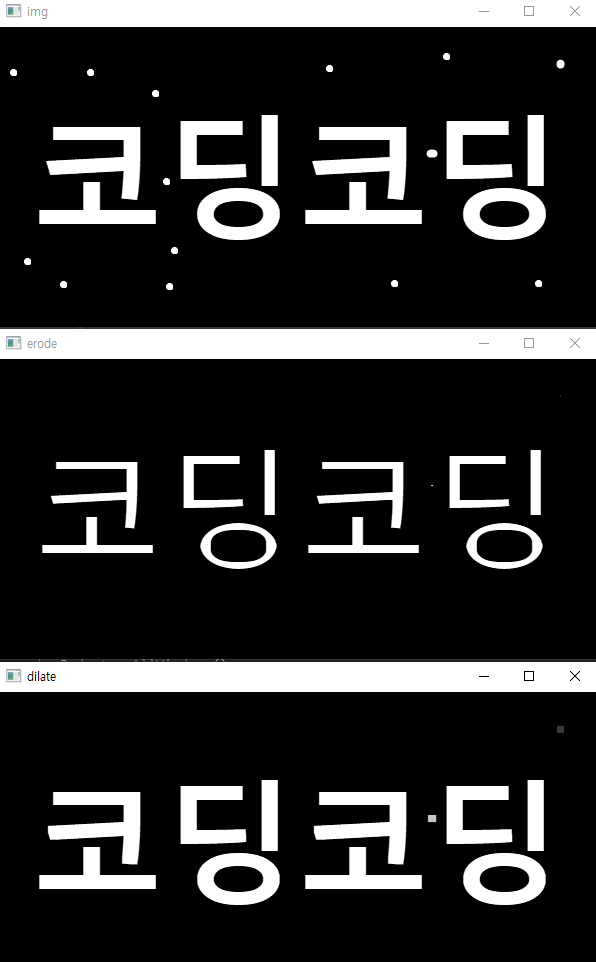
16. 이미지 변환 (열림 & 닫힘)
열림 (Opening) : 침식 후 팽창, 깎아서 노이즈 제거 후 메움
dilate(erode(image))
In [9]:
import cv2
import numpy as np
kernel = np.ones((3, 3), dtype=np.uint8)

img = cv2.imread('erode.png', cv2.IMREAD_GRAYSCALE)

erode = cv2.erode(img, kernel, iterations=3)
dilate = cv2.dilate(erode, kernel, iterations=3)

cv2.imshow('img', img)
cv2.imshow('erode', erode)
cv2.imshow('dilate', dilate)
cv2.waitKey(0)
cv2.destroyAllWindows()
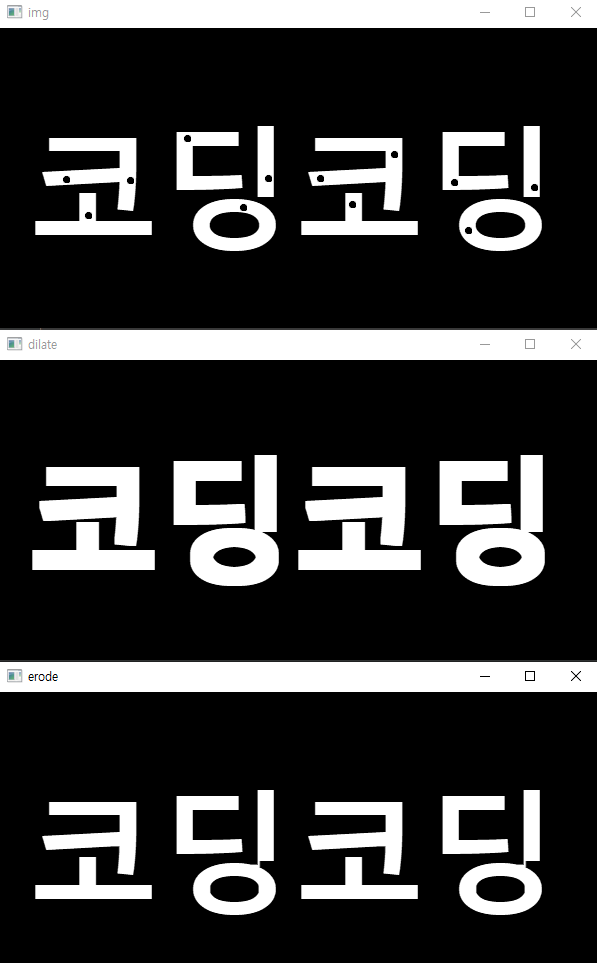
닫힘 (Closing) : 팽창 후 침식, 구멍을 메운 후 다시 깎음
erode(dilate(image))
In [10]:
import cv2
import numpy as np
kernel = np.ones((3, 3), dtype=np.uint8)

img = cv2.imread('dilate.png', cv2.IMREAD_GRAYSCALE)

dilate = cv2.dilate(img, kernel, iterations=3)
erode = cv2.erode(dilate, kernel, iterations=3)

cv2.imshow('img', img)
cv2.imshow('dilate', dilate)
cv2.imshow('erode', erode)
cv2.waitKey(0)
cv2.destroyAllWindows()
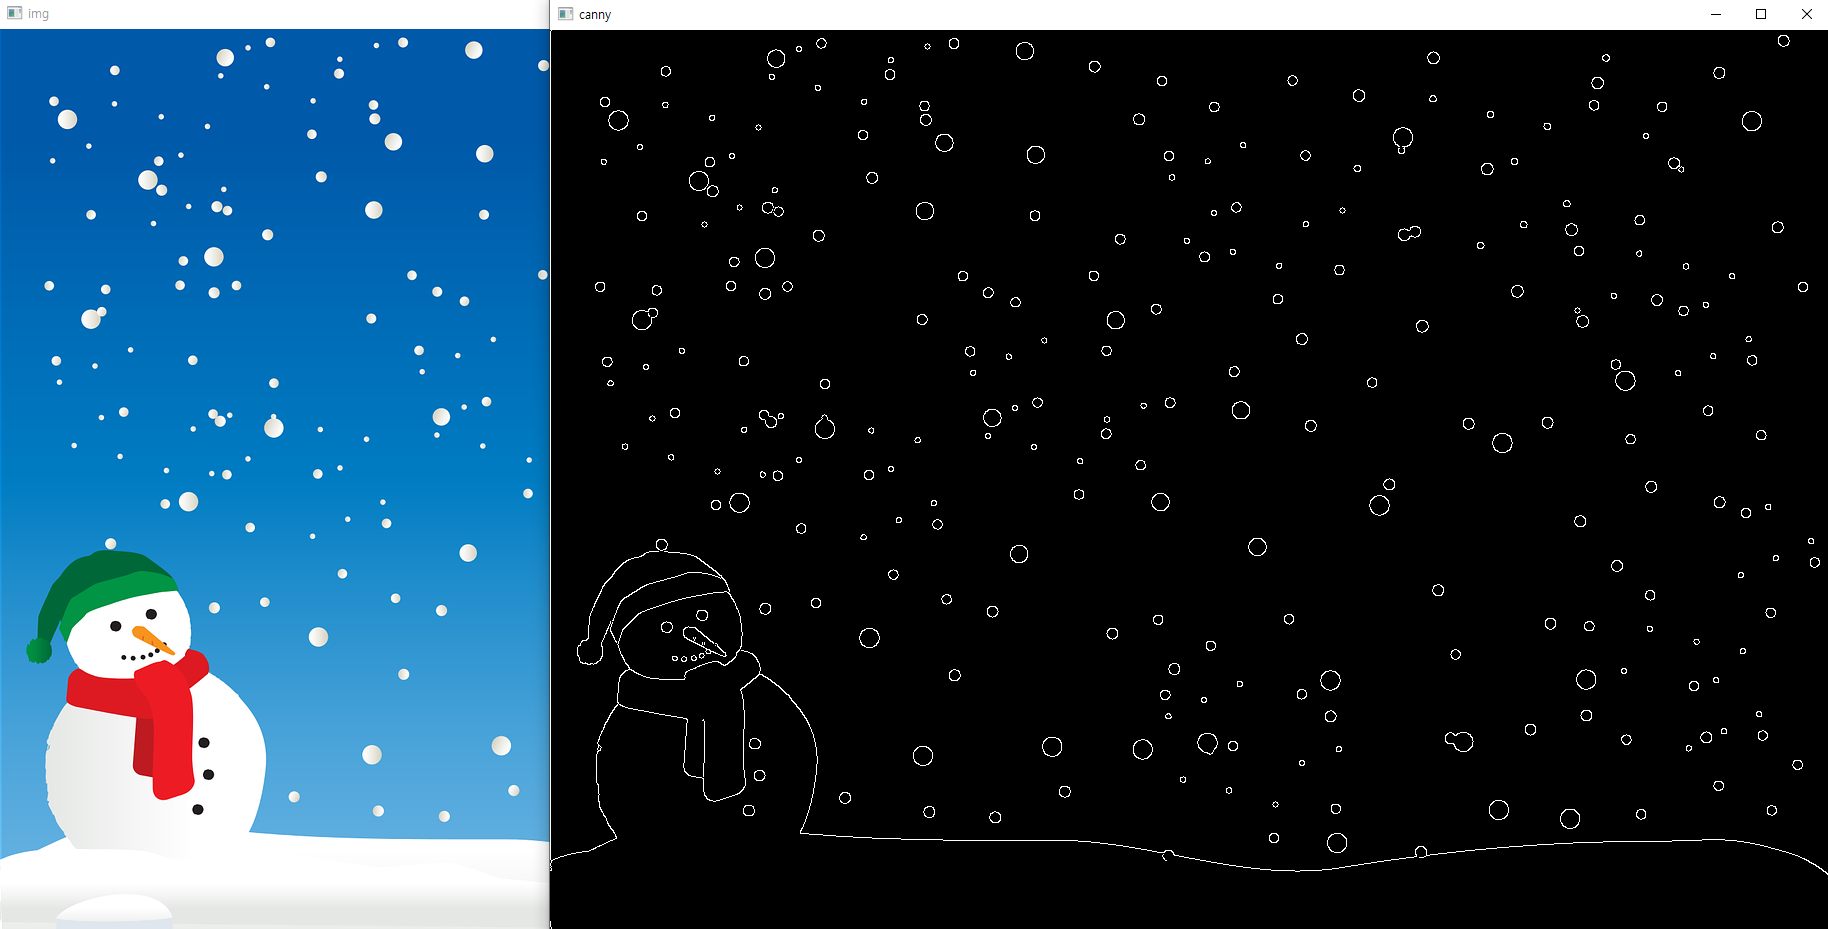
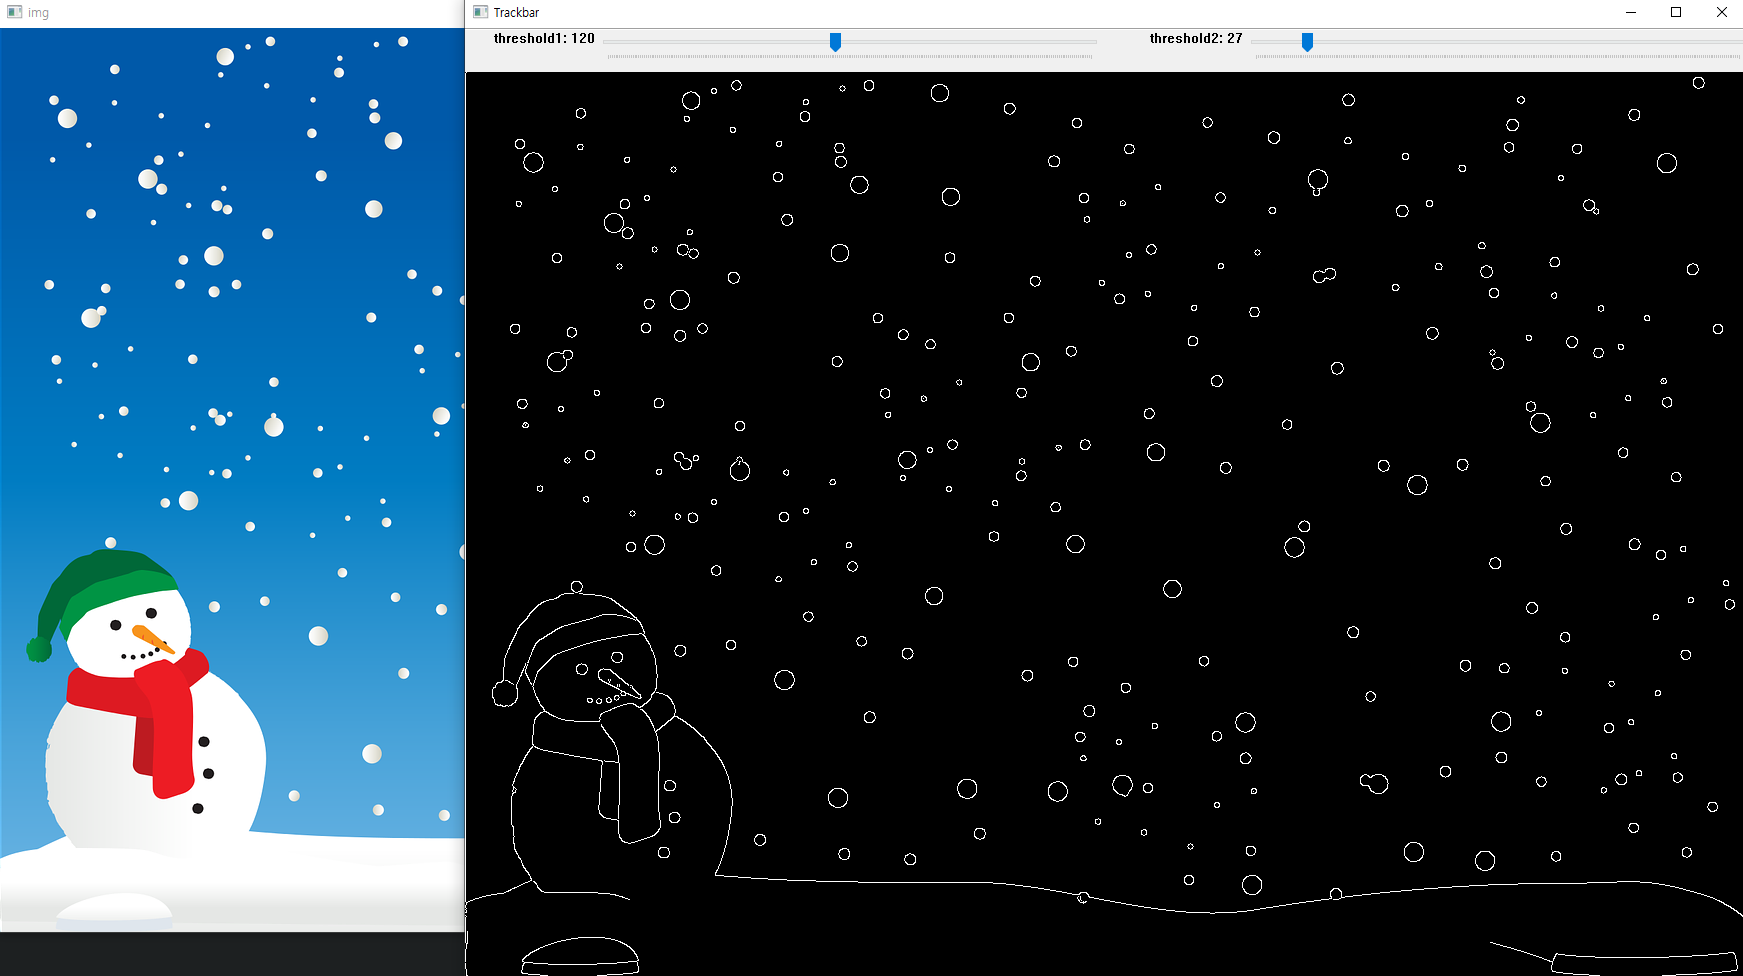
17. 이미지 검출 (경계선)
Canny Edge Detection
In [11]:
import cv2
img = cv2.imread('snowman.png')

canny = cv2.Canny(img, 150, 200) # 대상 이미지, minVal(하위 임곗값), maxVal(상위 임곗값)

cv2.imshow('img', img)
cv2.imshow('canny', canny)
cv2.waitKey(0)
cv2.destroyAllWindows()
In [12]:
import cv2
def empty(pos):
    pass

img = cv2.imread('snowman.png')

name = 'Trackbar'
cv2.namedWindow(name)
cv2.createTrackbar('threshold1', name, 0, 255, empty) # minVal
cv2.createTrackbar('threshold2', name, 0, 255, empty) # maxVal

while True:
    threshold1 = cv2.getTrackbarPos('threshold1', name)
    threshold2 = cv2.getTrackbarPos('threshold2', name)
    canny = cv2.Canny(img, threshold1, threshold2)

    cv2.imshow('img', img)
    cv2.imshow(name, canny)

    if cv2.waitKey(1) == ord('q'):
        break

cv2.destroyAllWindows()
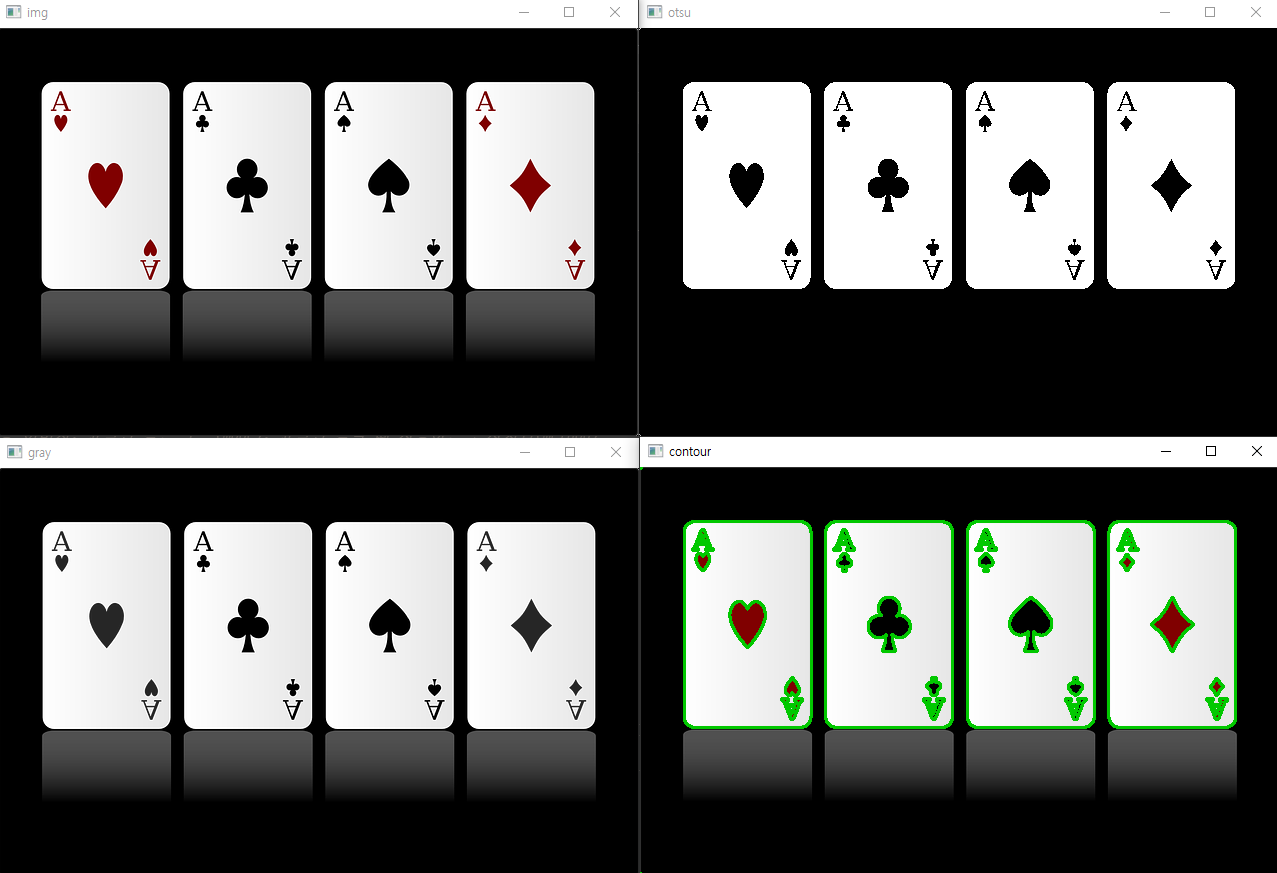
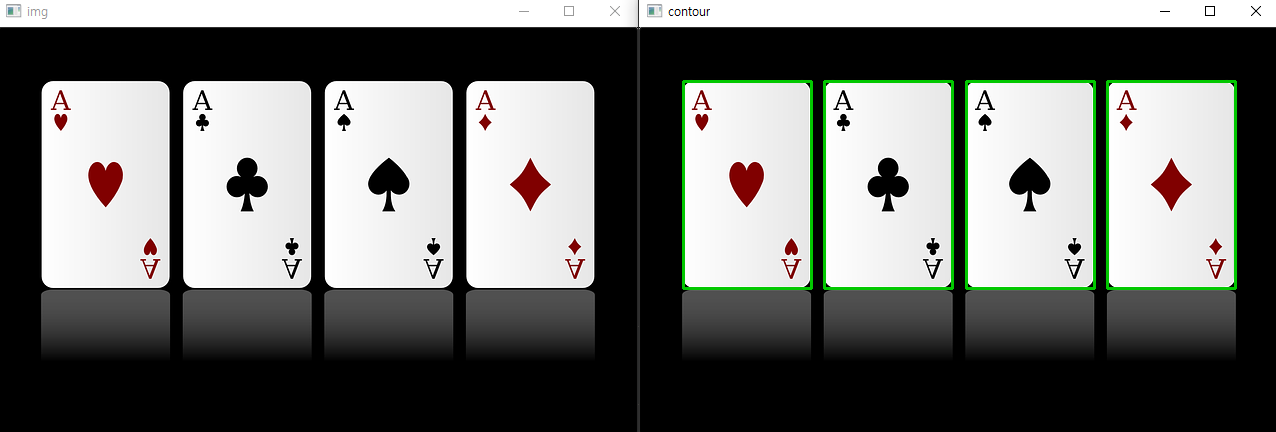
18. 이미지 검출 (윤곽선)
윤곽선 (Contour) : 경계선을 연결한 선
In [13]:
import cv2
img = cv2.imread('card.png')
target_img = img.copy() # 사본 이미지

gray = cv2.cvtColor(img, cv2.COLOR_BGR2GRAY)
ret, otsu = cv2.threshold(gray, -1, 255, cv2.THRESH_BINARY | cv2.THRESH_OTSU)

# 윤곽선 검출
contours, hierarchy = cv2.findContours(otsu, cv2.RETR_LIST, cv2.CHAIN_APPROX_NONE)
# 윤곽선 정보, 계층 구조 = 대상 이미지, 윤곽선 찾는 모드(mode), 윤곽선 찾을 때 사용하는 근사치법(method)

# 윤곽선 그리기
COLOR = (0, 200, 2) # 녹색
cv2.drawContours(target_img, contours, -1, COLOR, 2)
# 대상 이미지, 윤곽선 정보, 인덱스(-1는 전체), 색깔, 두께

cv2.imshow('img', img)
cv2.imshow('gray', gray)
cv2.imshow('otsu', otsu)
cv2.imshow('contour', target_img)

cv2.waitKey(0)
cv2.destroyAllWindows()
근사치 법
- CHAIN_APPROX_NONE : 모든 좌표 반환
- CHAIN_APPROX_SIMPLE : 꼭지점 좌표만 중복 제거하여 반환 (메모리 절약)
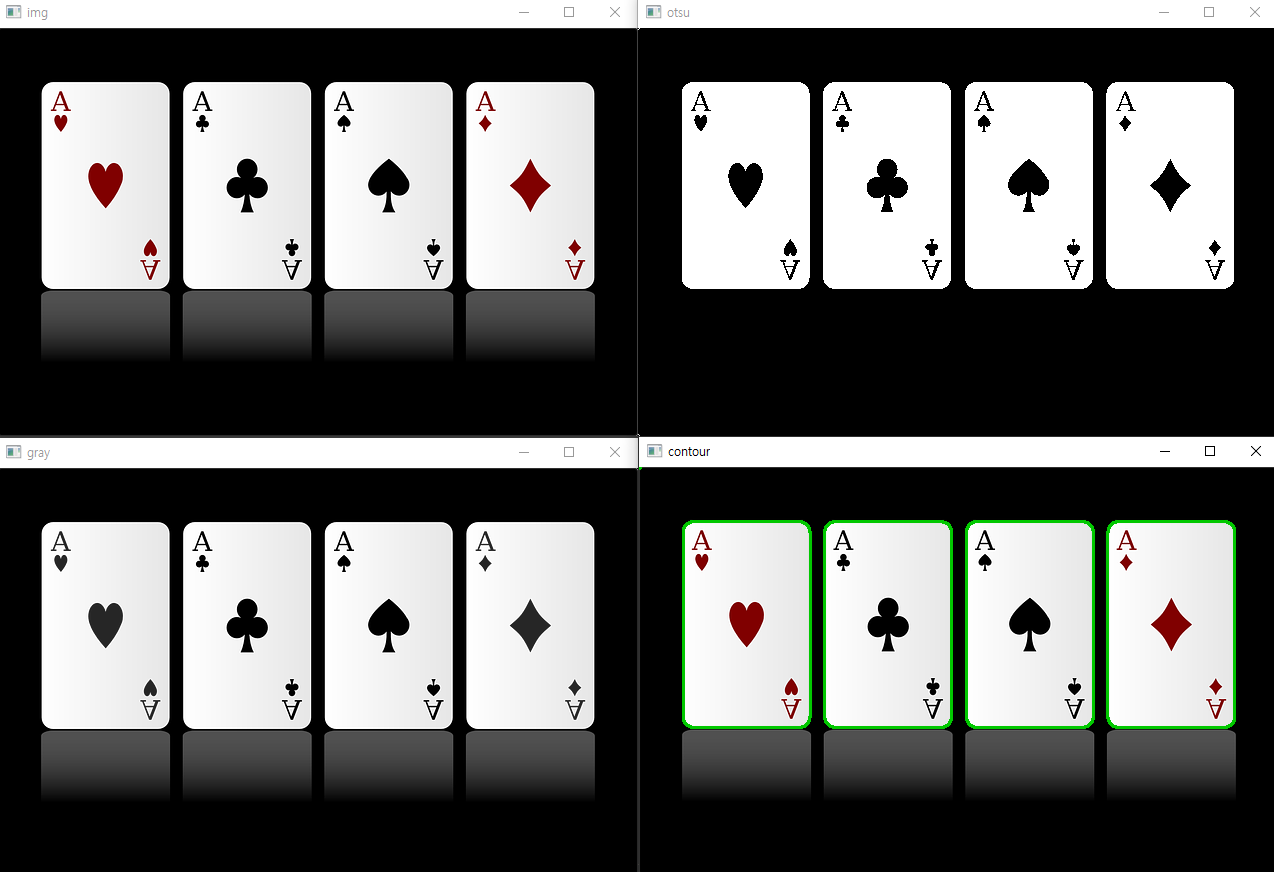
윤곽선 찾기 모드
- cv2.RETR_EXTERNAL : 가장 외곽의 윤곽선만 찾음
- cv2.RETR_LIST : 모든 윤곽선 찾음 (계층 정보 없음)
- cv2.RETR_TREE : 모든 윤곽선 찾음 (계층 정보를 트리 구조로 생성)
In [14]:
import cv2
img = cv2.imread('card.png')
target_img = img.copy() # 사본 이미지

gray = cv2.cvtColor(img, cv2.COLOR_BGR2GRAY)
ret, otsu = cv2.threshold(gray, -1, 255, cv2.THRESH_BINARY | cv2.THRESH_OTSU)

# contours, hierarchy = cv2.findContours(otsu, cv2.RETR_LIST, cv2.CHAIN_APPROX_NONE)
contours, hierarchy = cv2.findContours(otsu, cv2.RETR_EXTERNAL, cv2.CHAIN_APPROX_NONE)
# contours, hierarchy = cv2.findContours(otsu, cv2.RETR_TREE, cv2.CHAIN_APPROX_NONE)
# print(hierarchy)
# print(f'총 발견 갯수 : {len(contours)}')

COLOR = (0, 200, 2) # 녹색
cv2.drawContours(target_img, contours, -1, COLOR, 2)

cv2.imshow('img', img)
cv2.imshow('gray', gray)
cv2.imshow('otsu', otsu)
cv2.imshow('contour', target_img)

cv2.waitKey(0)
cv2.destroyAllWindows()
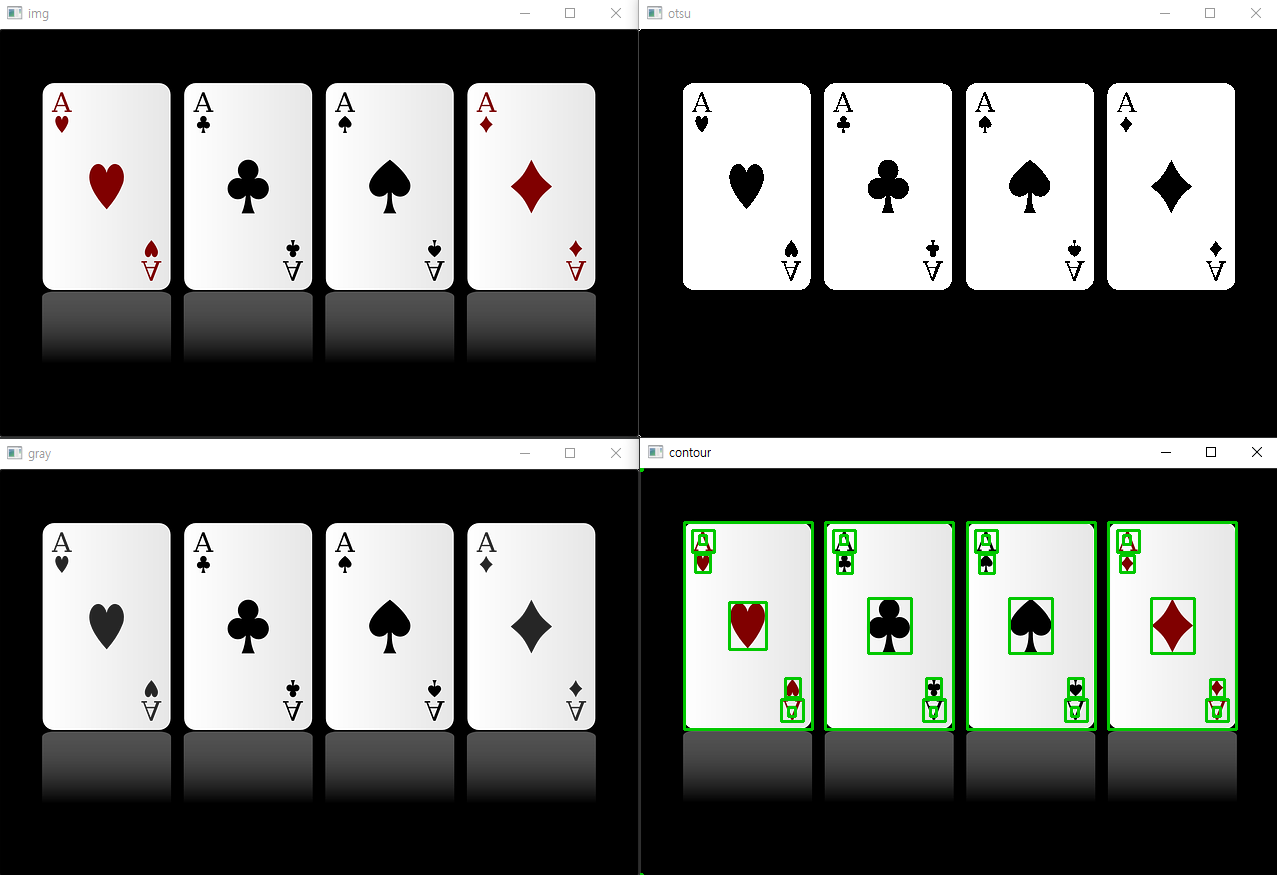
경계 사각형
윤곽선의 경계면을 둘러싸는 사각형
boundingRect()
In [15]:
import cv2
img = cv2.imread('card.png')
target_img = img.copy() # 사본 이미지

gray = cv2.cvtColor(img, cv2.COLOR_BGR2GRAY)
ret, otsu = cv2.threshold(gray, -1, 255, cv2.THRESH_BINARY | cv2.THRESH_OTSU)
contours, hierarchy = cv2.findContours(otsu, cv2.RETR_LIST, cv2.CHAIN_APPROX_NONE)


COLOR = (0, 200, 2) # 녹색

for cnt in contours:
    x, y, width, height = cv2.boundingRect(cnt)
    cv2.rectangle(target_img, (x, y), (x + width, y + height), COLOR, 2) # 사각형 그리기

cv2.imshow('img', img)
cv2.imshow('gray', gray)
cv2.imshow('otsu', otsu)
cv2.imshow('contour', target_img)

cv2.waitKey(0)
cv2.destroyAllWindows()
면적
contourArea()
In [16]:
import cv2
img = cv2.imread('card.png')
target_img = img.copy() # 사본 이미지

gray = cv2.cvtColor(img, cv2.COLOR_BGR2GRAY)
ret, otsu = cv2.threshold(gray, -1, 255, cv2.THRESH_BINARY | cv2.THRESH_OTSU)
contours, hierarchy = cv2.findContours(otsu, cv2.RETR_LIST, cv2.CHAIN_APPROX_NONE)


COLOR = (0, 200, 2) # 녹색

for cnt in contours:
    if cv2.contourArea(cnt) > 25000: # 카드의 면적
        x, y, width, height = cv2.boundingRect(cnt)
        cv2.rectangle(target_img, (x, y), (x + width, y + height), COLOR, 2)

cv2.imshow('img', img)
cv2.imshow('contour', target_img)

cv2.waitKey(0)
cv2.destroyAllWindows()
미니 프로젝트 : 개별 카드 추출해서 파일 저장
In [17]:
import cv2
img = cv2.imread('card.png')
target_img = img.copy()

gray = cv2.cvtColor(img, cv2.COLOR_BGR2GRAY)
ret, otsu = cv2.threshold(gray, -1, 255, cv2.THRESH_BINARY | cv2.THRESH_OTSU)
contours, hierarchy = cv2.findContours(otsu, cv2.RETR_LIST, cv2.CHAIN_APPROX_NONE)


COLOR = (0, 200, 2)
idx = 1
for cnt in contours:
    if cv2.contourArea(cnt) > 25000:
        x, y, width, height = cv2.boundingRect(cnt)
        cv2.rectangle(target_img, (x, y), (x + width, y + height), COLOR, 2)

        crop = img[y:y+height, x:x+width]
        cv2.imshow(f'card_crop_{idx}', crop)
        cv2.imwrite(f'card_crop_{idx}.png', crop) # 파일 저장
        idx += 1

cv2.imshow('img', img)
cv2.imshow('contour', target_img)

cv2.waitKey(0)
cv2.destroyAllWindows()

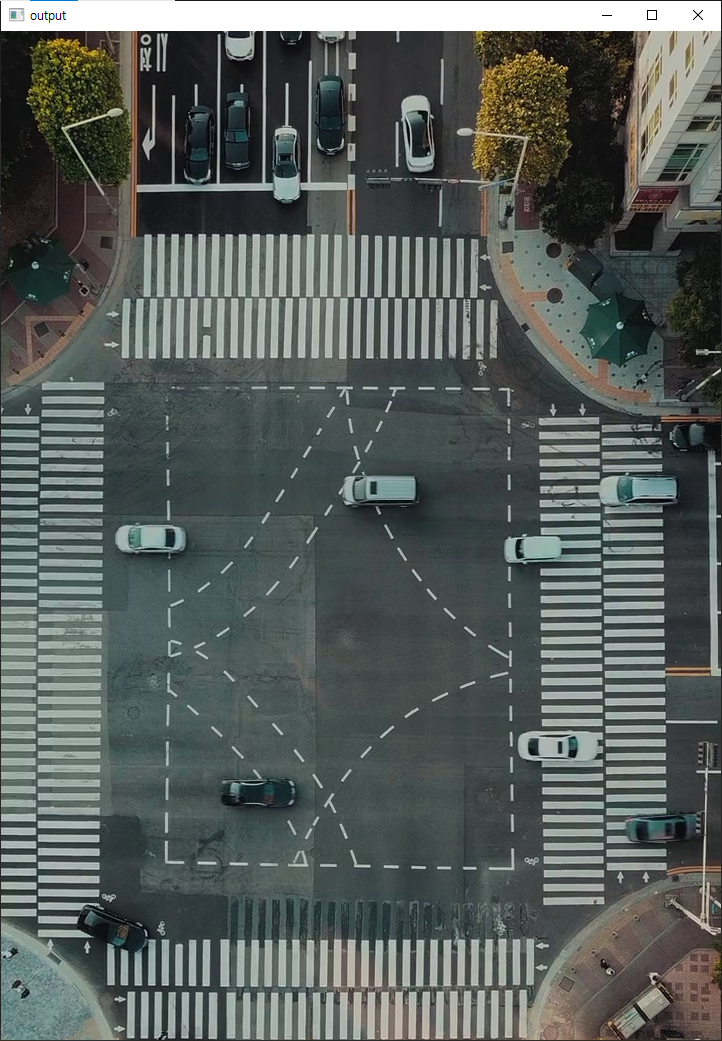
퀴즈
OpenCV를 이용하여 가로로 촬영된 영상을 세로로 회전하는 프로그램 작성
조건
- 회전: 반시계 방향으로 90도
- 재생속도(FPS): 원본의 x4
- 출력 파일명: city_output.avi(코덱:DIVX)
- 원본 파일명: city.mp4
In [18]:
import cv2
cap = cv2.VideoCapture('city.mp4')

fourcc = cv2.VideoWriter_fourcc(*'DIVX')

width = round(cap.get(cv2.CAP_PROP_FRAME_HEIGHT))
height = round(cap.get(cv2.CAP_PROP_FRAME_WIDTH))
fps = cap.get(cv2.CAP_PROP_FPS) * 4

out = cv2.VideoWriter('city_output.avi', fourcc, fps, (width, height))

while cap.isOpened():
    ret, frame = cap.read()
    if not ret:
        break

    rotate = cv2.rotate(frame, cv2.ROTATE_90_COUNTERCLOCKWISE)
    out.write(rotate)
    cv2.imshow('output', rotate)
    if cv2.waitKey(1) == ord('q'):
        break
out.release()
cap.release()
cv2.destroyAllWindows()
Reference
- 나도코딩: 파이썬 코딩 무료 강의 (활용편6) - OpenCV 이미지 처리
- Pexels, Tembela Bohle: 책 이미지
- Pixabay, OpenClipart-Vectors: 눈사람 이미지
- Pixabay, OpenClipart-Vectors: 카드 이미지
- Pexels, Taryn Elliott: 퀴즈 영상
댓글남기기